Tuesday, January 31, 2012

The Perfect Sugar Cookie


The Perfect Sugar Cookie
Ingredients
6 cups (750 grams/1 lb + 10 ounces) sifted all-purpose flour
1 teaspoon (6 grams) salt
2 cups unsalted butter, (1 lb, 454 grams, 16 ounces) softened for about 20 minutes at room temperature
2 cups (400 grams/14 ounces) sugar
2 large eggs (straight from refrigerator)
2 teaspoons (10 mL) pure vanilla extract
1/4 teaspoon (1.25 mL) pure lemon extract

Method
1. In large bowl, sift together flour and salt. Set aside.
2. Use an electric mixer to cream butter and sugar until fluffy. Beat in eggs.
3. Add flour mixture and mix on low speed until thoroughly combined. Stir in vanilla and lemon extract.

Steps to the perfect rolled dough (again, modest, I know):
4. Remove 1/2 of dough from bowl, make a ball, and place on a large piece of plastic wrap on counter.
5. Wrap the sides of wrap over the ball, then press down with the palm of your hand and make a disc about 2" thick. Finish wrapping the disc with the plastic wrap. Repeat with 2nd half of dough.
6. Chill both discs of dough for about 45 minutes.
7. Remove one disc and remove plastic wrap. Place on top of a large piece of parchment paper (I use a silicone rolling mat underneath to ensure it doesn't slip while rolling, but you can even dampen counter so the parchment sticks a bit.), then place 2 wooden dowels on either side of your dough, then another sheet of parchment paper.
8. Roll dough (this will require a bit of elbow grease for the first few minutes until it softens up a bit) so it's flush with dowels--they will ensure that your dough is even thickness.
9. Preheat your oven to 350 F. Slide your parchment paper and dough onto a board, then place in refrigerator for about 15 minutes.
10. Remove from fridge, and cut your shapes using the cutters of your choice, placing them on a baker's half sheet lined with a Silpat Mat, with 2" clearance around each one and the edge of sheet.
11. Place sheet with cookies into freezer for 15 minutes before baking. Then bake 10-12 minutes, or until edges are golden brown.
12. Cool sheets on wire racks for 10 minutes, then gently remove cookies and place on wire racks to finish cooling.
May be stored at room temperature in an airtight container for up to 2 weeks. They also freeze well.

Wednesday, January 25, 2012

Sugar Cookies


Sugar Cookie Recipe

Ingredients:

2  1/2 cups butter (at room temperature)
2 cups sugar
2 large eggs
seeds from 1 vanilla bean (or 3 tsp vanilla)
5 cups flour
1 tsp baking powder
1 tsp salt

Instructions:

1. Cream the butter and sugar together in the bowl of an electric mixer on low to medium speed.  (Use the paddle attachment).  Mix until thoroughly incorporated – for about one minute.  Scrape down the sides of the bowl with a plastic spatula and mix again for a few seconds more.

Over mixing the butter and sugar in this step will cause too much air to be incorporated into the dough.  If you’d like a light and fluffy cookie, that’s ideal, however the dough will spread more during baking; not ideal if you’d like the cookie to hold its shape.

2. Add eggs slowly and mix.  Scrape down the bowl with your spatula at least once and mix again.
3. Cut open your vanilla bean and scrape the seeds out.  Add to mixing bowl.  Alternatively, add liquid vanilla extract.  Stir briefly.
4. Sift your dry ingredients together.  (Flour, baking powder and salt).
5. Add all of the flour mixture to the bowl.  Place a large tea towel or two small tea towels between the edge of the bowl and the electric mixer so that the flour won’t escape.  Mix on low speed for 3o seconds.  Remove the tea towels and observe the dough mixing; when it clumps around the paddle attachment it’s ready.  It’s also important at this stage not to over mix the dough (the glutens in the flour develop and the dough can become tough).
6. Roll the dough out between 2 large pieces of parchment paper.  Place on a baking sheet and into the fridge for a minimum of 1 hour.
7. Roll out the dough further if you need to, and cut out cookie shapes.  Place on parchment paper-lined baking sheet.  Re-roll scraps and repeat.
8. Put cookie dough shapes back into the fridge for 10 minutes to 1 hour to chill again.  They will then hold their shape better when baked.
9. Preheat your oven to 350°F or 176°C.
10. Bake cookies for 8-12 minutes or until the edges become golden brown.  The baking time will depend on the size of your cookie.
11. Let cookies cool to room temperature and decorate!


Tuesday, January 24, 2012

Mini Hi Hats Cupcakes


RECIPE from http://www.marthastewart.com

Ingredients

For The Batter
3 ounces unsweetened chocolate, chopped
1 cup all-purpose flour
1/2 teaspoon baking powder
1/2 teaspoon baking soda
1/4 teaspoon salt
1/2 cup (1 stick) unsalted butter, softened
1 1/4 cups sugar
2 large eggs
1 teaspoon vanilla extract
1/2 cup sour cream

For The Frosting (Meringue frosting)
1 3/4 cups sugar
3 large egg whites
1/4 teaspoon cream of tartar
1 teaspoon vanilla extract
1/2 teaspoon almond extract

For The Chocolate Coating
2 cups chopped (about 12 ounces) semisweet chocolate
3 tablespoons canola or vegetable oil


Directions
1.Preheat oven to 350 degrees with rack in center. Prepare the batter: Place chocolate in a medium heatproof bowl, and set it over a medium saucepan of barely simmering water; stir chocolate until melted and smooth. Remove bowl from heat, and set aside to cool slightly.

2.Meanwhile, whisk together flour, baking powder, baking soda, and salt in a medium bowl; set aside.

3.In the bowl of an electric mixer fitted with the paddle attachment, cream butter and sugar on medium speed, scraping sides of bowl as needed, until light and fluffy. On low speed, mix in melted chocolate. Increase speed to medium, and add eggs, one at a time, mixing well after each addition. Add vanilla, and beat until mixture is creamy and color has lightened slightly, about 1 minute. Mix in sour cream. On low speed, add half of reserved flour mixture, beating until just incorporated. Mix in 1/2 cup water. Add remaining flour mixture, and mix until just incorporated.

4.Line a cupcake pan with paper liners. Fill each liner with enough batter to come 1/8 inch from top, about 1/3 cup. Bake, rotating pans halfway through, until tops are firm and a cake tester inserted in the center comes out clean, about 20 minutes. Transfer cupcakes to a wire rack to cool in pan for 10 minutes.

5.Use a small knife to loosen any tops stuck to the pan. Carefully invert cupcakes onto the wire rack. Turn cupcakes right side up, and let cool completely.

6.Prepare the frosting: In a large heatproof bowl, combine sugar, 1/4 cup water, egg whites, and cream of tartar. Using a handheld electric mixer, beat on high speed until foamy, about 1 minute. Set bowl over a pan of barely simmering water. Beat on high speed until frosting forms stiff peaks, about 12 minutes; frosting should register 160 degrees.on a candy thermometer. Remove from heat; stir in vanilla and almond extracts, and beat for 2 minutes more until frosting thickens.

7.Transfer frosting to a large pastry bag fitted with a 1/2-inch plain pastry tip. Leaving a 1/8-inch border on each cupcake, pipe a spiral of frosting into a 2-inch-high cone shape, using about 1/2 cup of frosting per cupcake. Transfer cupcakes to a baking sheet, and refrigerate while preparing the chocolate coating.

8.Prepare the chocolate coating: Combine chocolate and oil in a medium heat-proof bowl set over a medium saucepan of barely simmering water; stir until melted and smooth. Transfer to a small bowl, and let cool about 15 minutes.

9.Holding each cupcake by its bottom, dip cupcake in the chocolate to coat frosting, allowing excess to drip off. Transfer to a baking sheet fitted with a wire rack. Spoon more coating around edge of cupcake and any exposed frosting; none of the frosting should show. Let cupcakes stand at room temperature 15 minutes.

10.Carefully remove paper liners from cupcakes, and discard. Place cupcakes on a serving platter, and refrigerate for 30 minutes to let coating set. Cover, and refrigerate for 2 hours more. Serve cold. Cupcakes can be refrigerated for up to 3 days.

Sunday, January 15, 2012

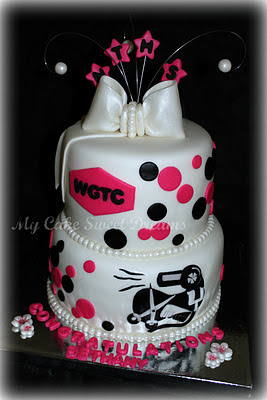
College graduation Cake


I made this cake for a beautiful girl Bethany !

Happy Bethany !

Bethany and I (Zana) :)


Printfriendly